【3D技术宅公社】XR数字艺术论坛  XR技术讨论 XR互动电影 定格动画

 找回密码
 立即注册

QQ登录

只需一步,快速开始

调查问卷
论坛即将给大家带来全新的技术服务,面向三围图形学、游戏、动画的全新服务论坛升级为UTF8版本后,中文用户名和用户密码中有中文的都无法登陆,请发邮件到324007255(at)QQ.com联系手动修改密码

3D技术论坛将以计算机图形学为核心,面向教育 推出国内的三维教育引擎该项目在持续研发当中,感谢大家的关注。

查看: 2694|回复: 4

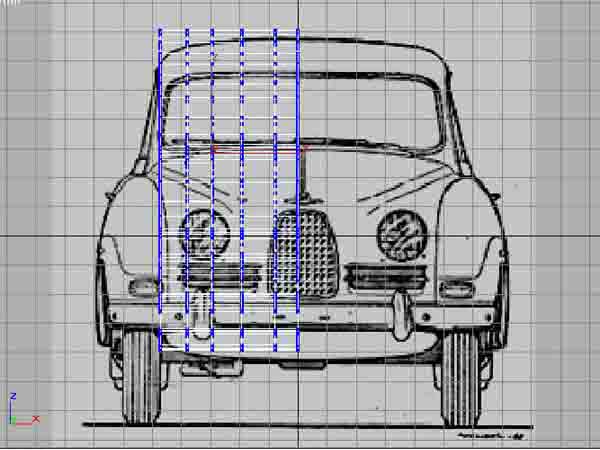
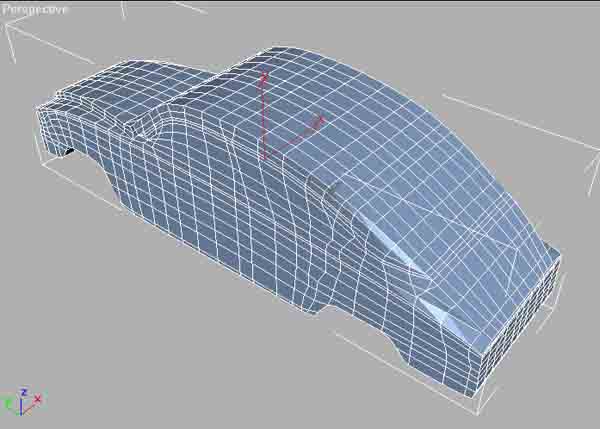
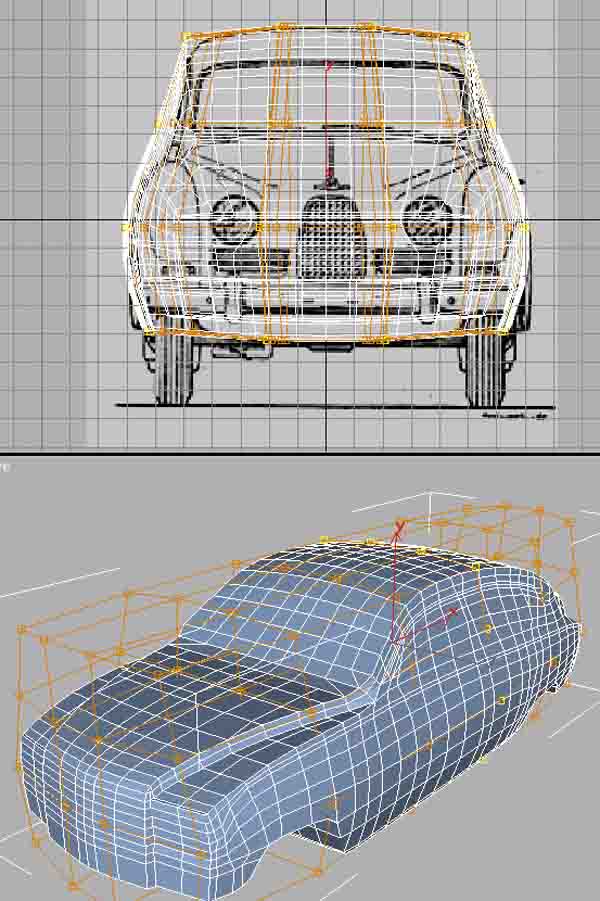
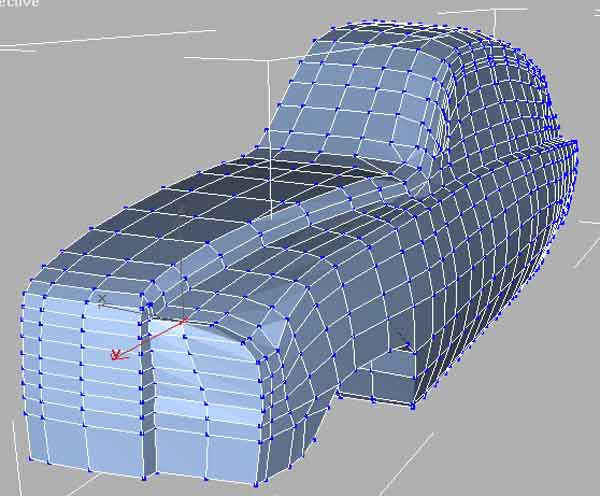
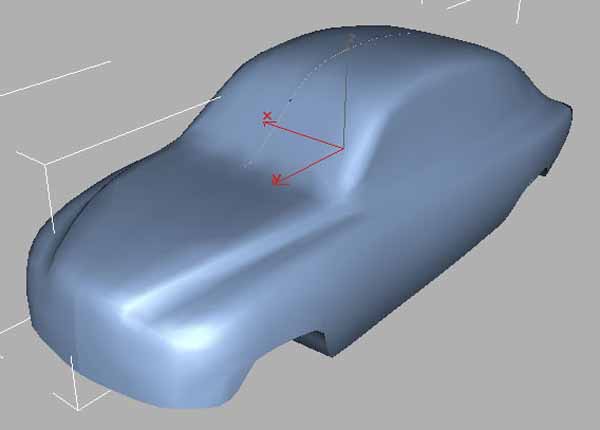
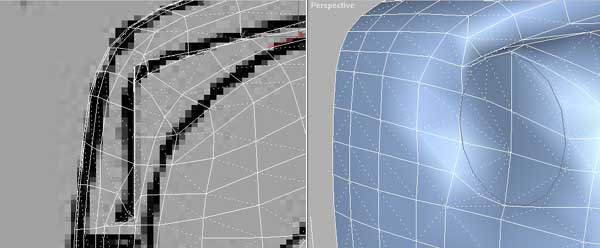
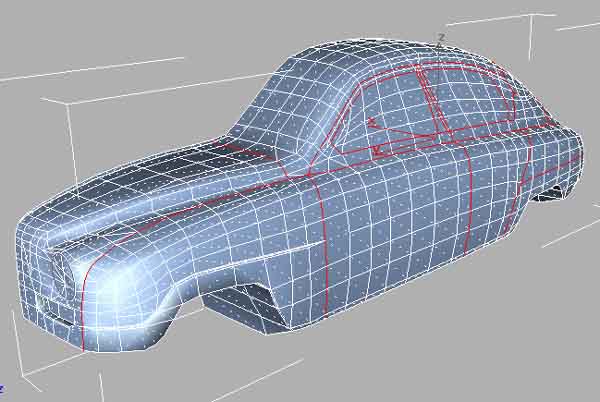
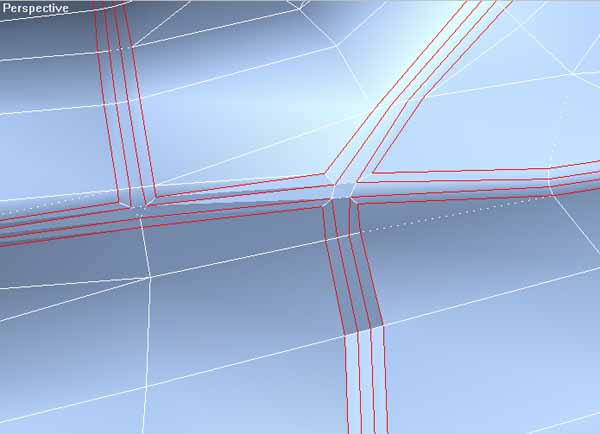
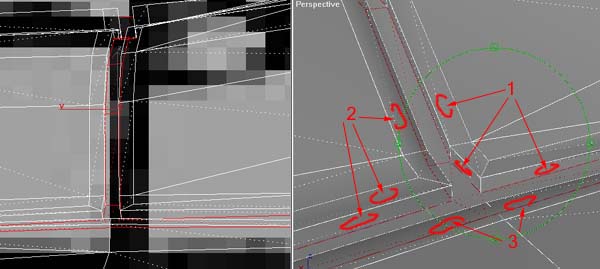
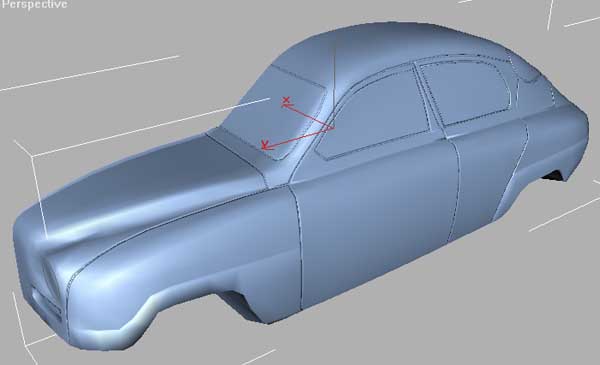
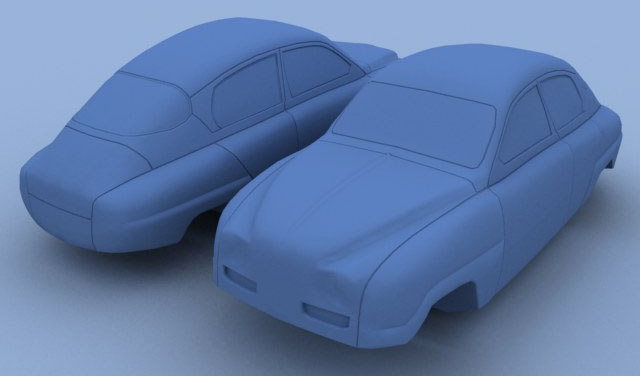
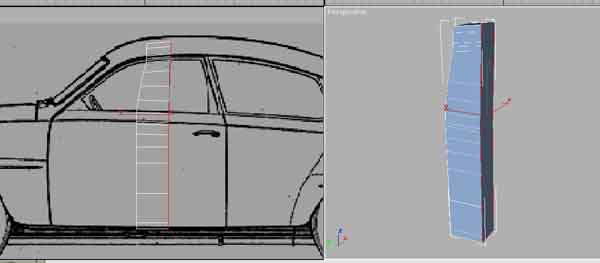
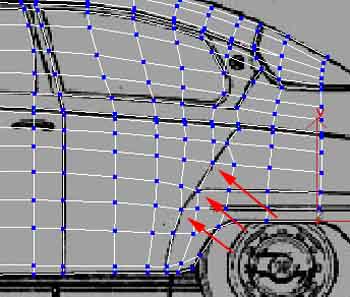
Box modeling the basic shape of a car(全英文)

[复制链接]
发表于 2003-12-18 16:40:52 | 显示全部楼层 |阅读模式


STEP 01
Get a nice blueprint of the car you want to make, ( www.suurland.com is a good site for blueprints)
or a photo straight from the side (front or back also helps).
And it´s always nice to have some pics of the car from all kind of angles for reference.
Put it as a viewport background, (use "match bitmap" and "lock zoom/pan" if you use 3Dsmax)
Then it´s time to start modeling, start with a box in the middle of the door, then extrude the top and bottom
faces like I did in the following pic. Try to think about how the shape of the car looks from the front/back
so you make polygons where the shape demands it.


STEP 02
Then select all polygons facing back and extrude them.
Remember that you needs edges in the mesh where there´s details on the car, look at the red arrows in the next pic.

STEP 03
Continue to extrude and remember to follow the details, but you dont need the solid edges to follow all details on the car.
You can also do as I show with the arrows in the next pic. Because since a face always (in 3dsmax atleast) have 3 sides
there´s a hidden edge crossing the polygon (you might have to turn it later on though).
发表于 2003-12-19 16:13:14 | 显示全部楼层
哇噻!真的看不懂啊!
 楼主| 发表于 2003-12-18 16:42:35 | 显示全部楼层
STEP 05
Now select the polygons so you can extrude them like in next pic.

STEP 06
Make the big shapes of the car (dont need to be exactly precise yet) like the next pic.
Then "mirror copy" and weld them, so you get a "full" car.
To weld the 2 parts, select the two middlerows of vertex and then scale them on x-axis, then you
can "weld selected" at 0,1
You can then run a "STL-check" to see of you have any errors on the mesh, if you have errors you
really need to fix them before you continue.

STEP 07
Then add a FFD(box) and set the number of controlers to something like on the next pic.
And then shape the car so it looks as much as the background pic as possible.

STEP 08
Delete one half of the car and Start working on the shapes. Now you might have to move some vertex
back so they are placed at the details you had them on in the start because of the FFD.
And you might need to chamfer some edges to make it look good, or you can even weld vertex if it´s
like in my case here to many on the front. (remember that the closer or more polys you have the harder it
is to get a smooth and soft shape without bumps in it).
 楼主| 发表于 2003-12-18 16:43:30 | 显示全部楼层
STEP 09
Add a smooth modifyer and set it so you get all round shapes in the same smoothinggroup.
Mirror copy the car (you dont need to weld it here) to see the shape better, it´s always good to do
this from time to time so you know if youre going in the right direction.

STEP 10
This step is maybe only if youre making a SAAB69, but you can always see it as a tip
For adding details like the frontlight I use a Circle with about the same amount of steps as i´m
planing to use on the mesh around the lights, this way it´s much easiere to get the round shape right.

STEP 11
Now select all the edges around the doors, windows and other parts.
You might need to remove the "edges only" option in the dispaly menu to see all edges you need to select.

STEP 12
Then chamfer the selected edges, but dont remove the selection because you should chamfer the edges one
more time to make it look like the pic below.
You might need to weld some vertexes after this because when you chamfer some edges you get dubble
vertexes depending on how many edges is going in to the vertex.

STEP 13
Now select The middle row of polygons of the 3 new ones,  and add a "face extrude" modifier and  minus extrude it
as deep ass you want. Then add a new smoothinggroup to the selected polygones you just -extruded.
Now you just need to fix the new polygons smoothinggroups so they match the part of the car they are on,
the new faces you extrude need the same smoothinggroup as the part they are the edges of.
like the numbers you see on this next pic (They dont need to have different smoothinggroups if they are
seperated by the -extruded polygones i just write different numbers to make it clear what i mean).
 楼主| 发表于 2003-12-18 16:44:18 | 显示全部楼层
STEP 14
This isnt really a step in the tutorial, it´s just shows what you should have after going through this tutorial.

Now you can continue to add the details youre car needs, and if youre planing to use mesh smooth
i think it works best if you apply "sepparate by smoothing groups". /GRID
您需要登录后才可以回帖 登录 | 立即注册

本版积分规则

手机版|小黑屋|3D数字艺术论坛 ( 沪ICP备14023054号 )

GMT+8, 2025-6-23 12:27

Powered by Discuz! X3.4

Copyright © 2001-2020, Tencent Cloud.

快速回复 返回顶部 返回列表